
World
 Map and Regions
4 cities, 17 regions and the Hunting Grounds, from level 1 to 400. Every region has its suggested level, monsters and boss. This guide covers the whole map and where to hunt at every level range.
On this page
How the map works
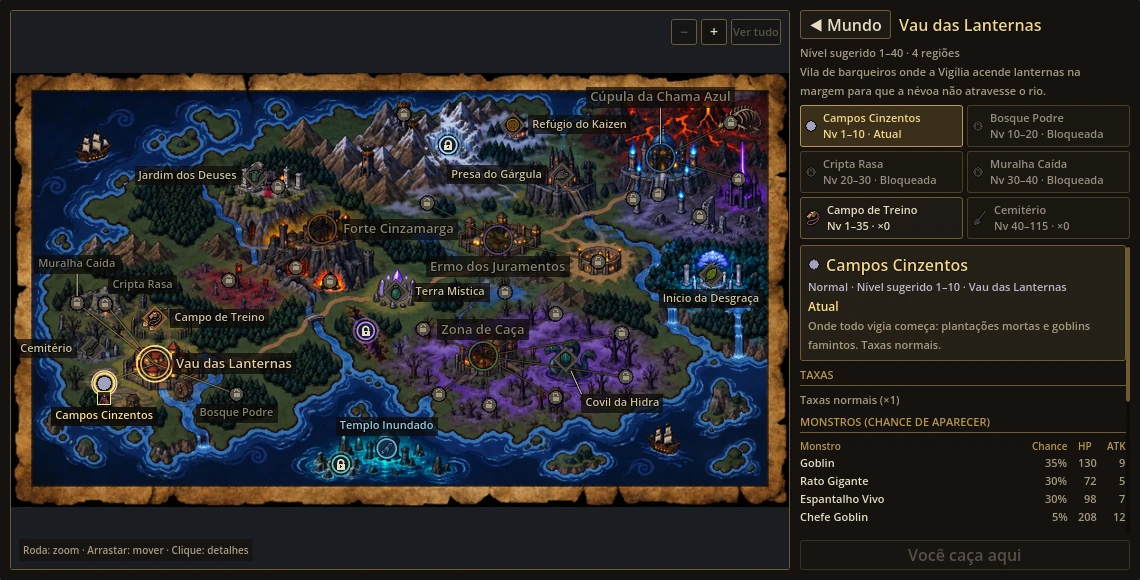
Open the Map (F2) and pick a city and a hunting region. Clearing a region — beating its boss — unlocks the next one in the same city; the boss of the last region unlocks the next city. The suggested level doesn't lock anything: it shows where XP pays off and where monsters get dangerous.
Region types
| Type | XP | Gold | Items | Materials | Best for |
|---|---|---|---|---|---|
| Normal | ×1 | ×1 | ×1 | ×1 | balance |
| XP region | ×1.3 | ×0.85 | ×0.5 | ×0.6 | leveling up |
| Drop region | ×0.75 | ×1.25 | ×1.6 | ×1.5 | items, materials and better affixes |
| City boss | ×1 | ×1 | ×1 | ×1 | the city's last; unlocks the next |
Region multipliers stack on top of the XP and drop multipliers in Options.
Lantern Ford
A boatmen's village where the Vigil lights lanterns on the bank so the mist never crosses the river.
- Level range
- 1–40
- Regions
- 4
| Region | Levels | Monsters | Boss | Gear |
|---|---|---|---|---|
| Ashen Fields Normal | 1–10 | Goblin | Goblin King of the FieldsHP 1,690 · after 35 kills | I |
| Rotten Grove XP region | 10–20 | Skeleton | Spider MotherHP 4,340 · after 47 kills | I |
| Shallow Crypt Drop region | 20–30 | Ghoul | Skeleton KnightHP 9,110 · after 61 kills | I |
| Fallen Wall City boss | 30–40 | Orc Warrior | Orc Warlord TuskarHP 13,510 · after 86 kills | I |
Ashbitter Fort
A fortress of black stone raised on the bones of the first wall; the Empty Throne can be seen from its battlements.
- Level range
- 40–120
- Regions
- 4
| Region | Levels | Monsters | Boss | Gear |
|---|---|---|---|---|
| Watcher's Hall Normal | 40–60 | Sentinel OgreAccuracy 8.4 | Captain of the Fallen GuardHP 26,790 · after 86 kills | II |
| Empty Throne XP region | 60–80 | The WatcherAccuracy 26.4 | The Crownless KingHP 39,870 · after 139 kills | II |
| Eclipse Catacombs Drop region | 80–100 | Violet GhoulAccuracy 56.6 | Eclipse PriestHP 66,360 · after 138 kills | III |
| Crimson Bastion City boss | 100–120 | Crimson ChampionAccuracy 60 | Crimson WarlordHP 85,190 · after 176 kills | III |
Oathwaste
A city of broken oaths, where mercenaries sell their swords to whoever pays in bones.
- Level range
- 120–250
- Regions
- 4
| Region | Levels | Monsters | Boss | Gear |
|---|---|---|---|---|
| Howling Moor XP region | 120–160 | Howling GhoulAccuracy 60 | Full Moon AlphaHP 110,400 · after 192 kills | III |
| Sunken Vaults Drop region | 160–200 | Vault GuardianIce · Accuracy 60 | Vault WardenHP 179,820 · after 230 kills | IV |
| Harpy Peaks Normal | 190–250 | Peak HarpyLightning · Accuracy 60 | Harpy QueenHP 273,120 · after 250 kills | V |
| Lords' Pit City boss | 200–250 | Ogre WarlordLightning · Accuracy 60 | Minotaur ChampionHP 280,610 · after 273 kills | V |
Bluefire Dome
The last city before the awakened throne: it burns in blue fire that gives no warmth, home to those who no longer fear death.
- Level range
- 250–400
- Regions
- 5
| Region | Levels | Monsters | Boss | Gear |
|---|---|---|---|---|
| Ashen Stairs XP region | 250–300 | Ash SentinelFire · Accuracy 60 | Ash ColossusHP 360,240 · after 307 kills | VI |
| Broken Reliquary Drop region | 300–350 | Living ReliquaryHoly · Accuracy 23.7 | Fallen HeraldHP 475,170 · after 259 kills | VI |
| Lich's Citadel Normal | 320–355 | Citadel LichIce · Accuracy 21.1 | Archlich MorvhalHP 551,540 · after 265 kills | VII |
| Eternal Vigil City boss | 350–400 | The Awakened WatcherHoly · Accuracy 15.7 | The Awakened WatcherHP 604,390 · after 275 kills | VII |
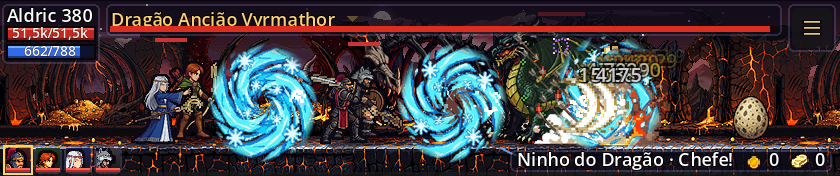
| Dragon's Nest Endgame | 355–400 | Nest DragonFire · Accuracy 14.4 | Elder Dragon VyrmathorHP 601,370 · after 290 kills | VII |
This is where the endgame regions are. The Lich's Citadel and the Eternal Vigil are the road past level 320; the Dragon's Nest opens after the Vigil's boss and pays more gold, items and materials, with better affixes.
Region bosses
Every region has a kill count to clear it. Reach it and the regular monsters stop while the boss shows up — bigger and glowing. Beat it without dying to clear the region. Dying first resets the count and the boss leaves; the count is saved when you close the game or switch heroes.
- Once cleared
- the boss returns every 60 kills
- Boss drops
- gold ×5, XP ×8, items and materials ×4
- Guaranteed
- 1 item of the region's tier
- Quest entries
- each of the region's entries at 10% or more
- Special attack
- Poison every 4 landed hits, for 6 s (1% HP per second)
- Dodge
- 5%
Hunting Grounds
The great hunting marsh, unlocked once you reach Ashbitter Fort. Each sector covers one level range, and yours follows your level. Normal XP, with plenty of quest entries and materials.
- Each sector covers a level range; you always hunt in the sector of your level, from 40 to 355.
- Normal XP, materials ×1.5, plenty of quest entries and Water Scrolls ×3.
- Sectors count as cleared: The Great Hunter shows up every 60 kills.
- Farming mode starts with the Hunting Grounds.
| Region | Levels | Monsters | Boss | Gear |
|---|---|---|---|---|
| Sector I Hunting Grounds | 40–80 | Starving WolfAccuracy 8.4 | The Great HunterHP 52,000 · after 120 kills | II |
| Sector II Hunting Grounds | 80–120 | Marsh LizardmanAccuracy 56.6 | The Great HunterHP 100,000 · after 120 kills | III |
| Sector III Hunting Grounds | 120–160 | Marsh HowlerAccuracy 60 | The Great HunterHP 150,000 · after 120 kills | III |
| Sector IV Hunting Grounds | 160–200 | Swamp GolemAccuracy 60 | The Great HunterHP 230,000 · after 120 kills | IV |
| Sector V Hunting Grounds | 200–250 | Marsh KnightAccuracy 60 | The Great HunterHP 300,000 · after 120 kills | V |
| Sector VI Hunting Grounds | 250–300 | Wandering LichAccuracy 60 | The Great HunterHP 470,000 · after 120 kills | VI |
| Sector VII Hunting Grounds | 300–355 | Young DragonAccuracy 23.7 | The Great HunterHP 650,000 · after 120 kills | VI |
Where to level
A route by level range. XP regions give more experience; the quests in your range add Experience Boxes; the Hunting Grounds are the steady option for materials and entries.
| Level | Regions | Quests | Hunting Grounds |
|---|---|---|---|
| 1–10 | Ashen Fields | Training Field | — |
| 10–20 | Rotten Grove (XP) | Training Field | — |
| 20–40 | Shallow Crypt (drop), Fallen Wall | Training Field | — |
| 40–60 | Watcher's Hall | Cemetery | Sector I |
| 60–80 | Empty Throne (XP) | Cemetery, Mystic Land Guardian | Sector I |
| 80–120 | Eclipse Catacombs (drop), Crimson Bastion | Cemetery | Sector II |
| 120–160 | Howling Moor (XP) | Garden of the Gods | Sector III |
| 160–200 | Sunken Vaults (drop) | Garden of the Gods, Kaizen's Refuge | Sector IV |
| 200–250 | Harpy Peaks, Lords' Pit | Kaizen's Refuge, Gargoyle's Fang | Sector V |
| 250–300 | Ashen Stairs (XP) | Kaizen's Refuge, Hydra's Lair | Sector VI |
| 300–320 | Broken Reliquary (drop) | Hydra's Lair | Sector VII |
| 320–355 | Lich's Citadel, Broken Reliquary (drop) | Beginning of Misfortune | Sector VII |
| 355–400 | Eternal Vigil, Dragon's Nest | — | — |
Remember the level-difference rule: XP starts dropping 10 levels above the region's strongest monster. Details in Level and XP.
Sealed Lands
Three lands sleep behind locked gates on the world map. They open with the Arch, the evolution after level 400 — coming soon.
| Land | Map entrance | Levels | Requires |
|---|---|---|---|
| Valdrima, the Kingdom of the Stilled Winter“A kingdom that chose to freeze rather than fall.” | Pass of the Silent Winter | Arch 1–200 | Arch |
| Dawnless Vale“Where the sun set once — and never rose again.” | Twilight Rift | Arch 150–355 | Arch 150 |
| Ysmarra, the Drowned Kingdom“Beneath every tide, an eye that does not sleep.” | Ysmarra Whirlpool | Arch 300–355 → Celestial 1–200 | Arch 300 + the 3 Keys |
The 3 Keys: Frost Key (Queen Sverna of Valdrima) · Penumbra Key (the Shadow Shepherd of the Dawnless Vale) · Tide Key (Neses in Water A, defeated as an Arch).
Game data from October 3, 2026.